Showing posts with label Original Pattern. Show all posts

Saturday, June 18, 2011

A Much More Masculine Hat

After I made my hat with the brim I wanted to try making another, but I didn't need another brimmed hat. I talked my boyfriend into letting me make one for him. We went pattern shopping on the internet and were pretty disappointed in what we found, nothing was like the hat I had proposed to him.  I could see the hat I wanted to make him in my head, so I started designing my own pattern. I started with the cast on from the pattern for my hat and altered it from there.  I let my boyfriend make a lot of the pattern choices, so this is truly a man's hat.

Materials:
210 yds worsted weight yarn, I used 100% wool
US 8 circular needles
US 8 dp needles
stitch marker(s)
piece of plastic for the brim, I used the other side of the cool whip container I used for my hat

Gauge: 18sts=4in
Abbreviations:
 k-knit
 p-purl
 K2 tog-knit two together
P2 tog- purl two together

Hat:
Cast on 96 stitches, place a marker at the beginning of the round and join being careful not to twist stitches. K2 p2 around, continue until hat measures 11.5 inches. ( I asked my bf if he wanted just the cuff to be ribbed, and the rest of the hat straight knitting, but he wanted ribbing all the way up. If you want just the cuff to be ribbed and the rest stockinette stitch, rib about 3 inches and then start stockinette stitch.)
Decrease:
Round 1: K2 tog P2 tog around
Round 2 and 3: k1 p1
Round 4: K2 tog
Round 5: k around
Round 6: K2 tog

Cut yarn leaving a tail, thread through remaining stitches, bring to the wrong side, pull tight, and weave in ends.
Brim:
I wanted the brim to be longer and more like that of a baseball hat than the way it turned out on my hat so I changed up the start of the short rows and how many rows there are between the short rows and the decrease rows.

Cast on 40 sts, knit is stockinette stitch. Start short rows on right side row 4 (as in the fourth row total, not the fourth of the right side rows).
Row 1: knit 25, turn
Row 2: slip 1 p12 turn
Row 3: slip 1 k15 turn
Row 4 slip 1 p18 turn
Continue to work in this manner, working three more stitches at the center each row until all 40 stitches have been worked. Work eight rows in stockinette stitch. Starting on a right side row bind of 2 sts, repeat 9 times (ten rows total 20 sts). Bind off 3 sts at the beginning of next four rows, 8 sts remain, bind off.
For some helpful tips on short rows and wrapping look here and here

Brim Assembly:
*note some pictures are from the assembly of the brim for my hat hence the different yarn color.

So step one fold the brim in half:
 I pinned the brim on a piece of paper and traced it before I took it to the cool whip container. Be sure to actually stretch your knitting when you pin it, you don't want your knitting to sag when you sew it around the brim. This is the tracing I got:
 I took the shaky outline and drew a smoother one just inside it small enough that the yarn would be able to be sewn over it. I cut out on the smooth line, folded it in half and trimmed it to make it symmetrical. Then I pined it to the cool whip container.
I traced my paper shape with sharpie
I'm pretty handy with knives and have had several art classes that relate to carving things, so I just carved this out with a box cutter. If you're not so steady of hand or experienced with knives I'd recommend scissors.
On my hat I could see a bit of the white from the plastic showing through my knitting so I covered the brim with electrical tape.
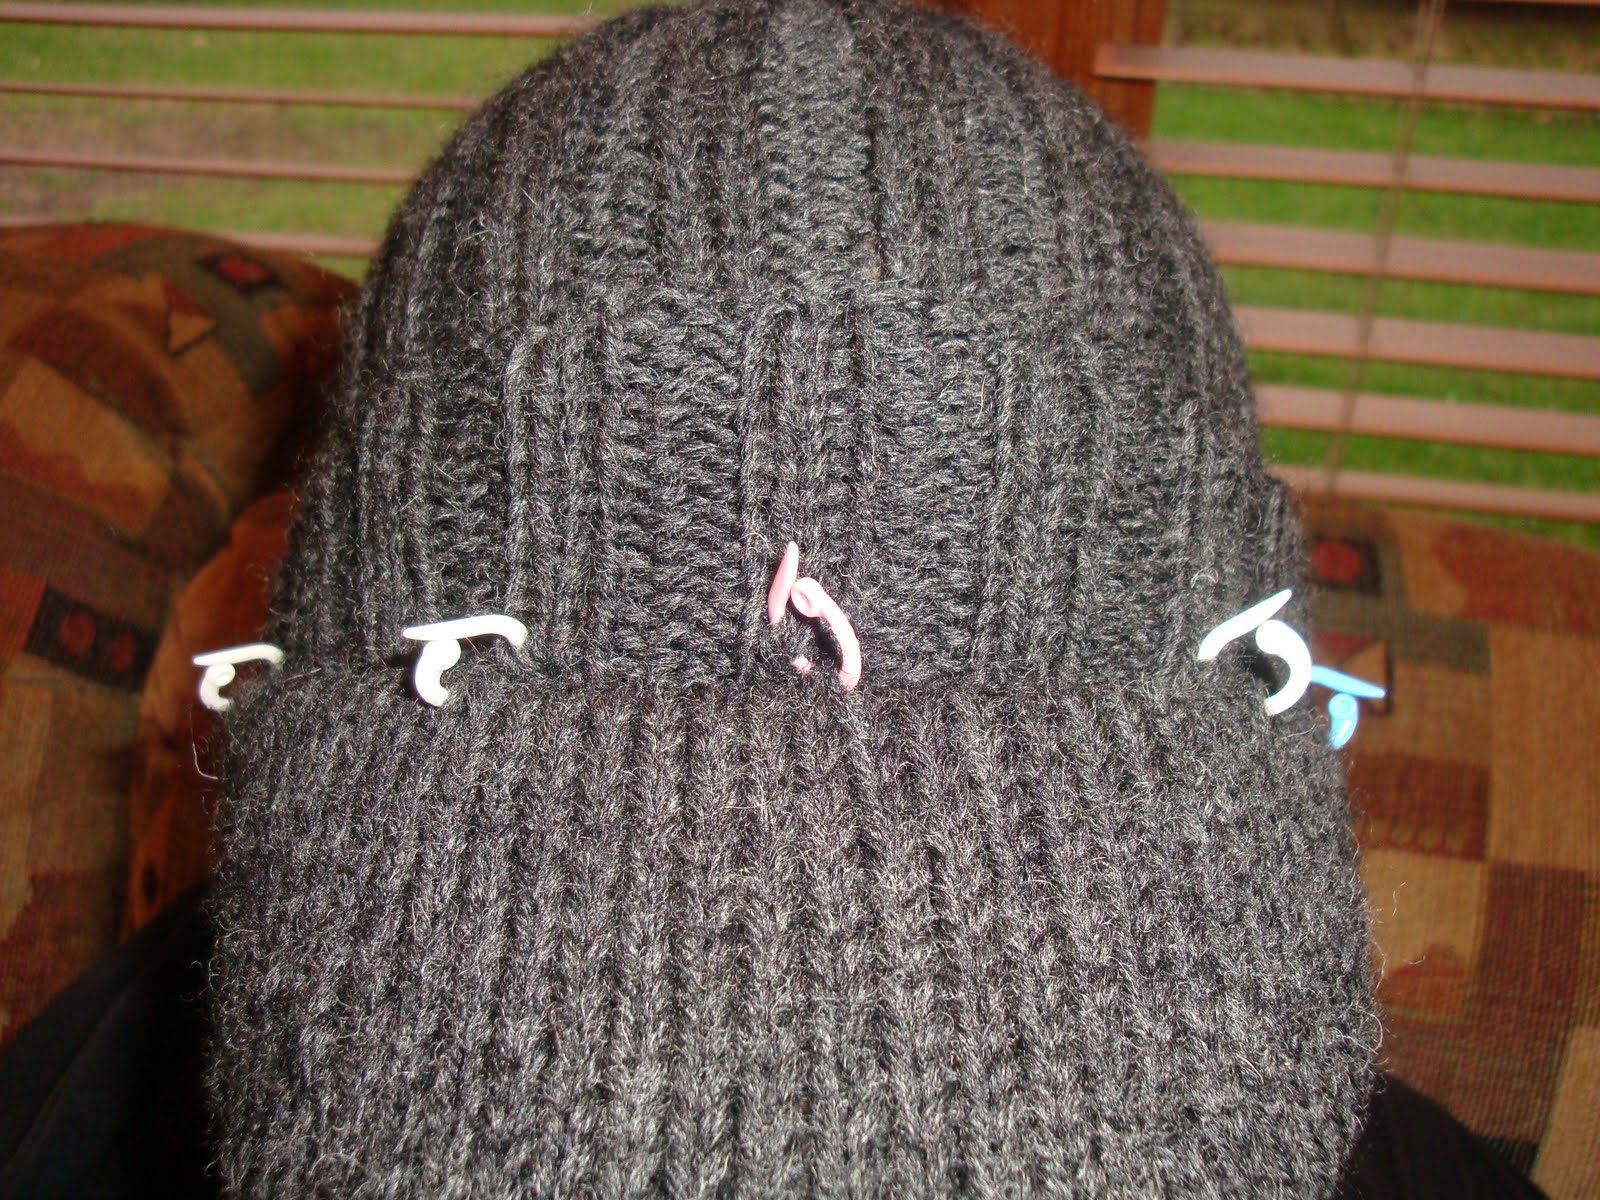
I used some stitch markers to pin my knitting around the hat brim


I used the tail from knitting it and started in the middle with a whip stitch. Here's the brim halfway sewn up
Unfortunately when I cast on I did not leave a long enough tail to sew up the other half of the brim, so I had to add an extra piece of yarn to do the other side.
This is the brim of my hat

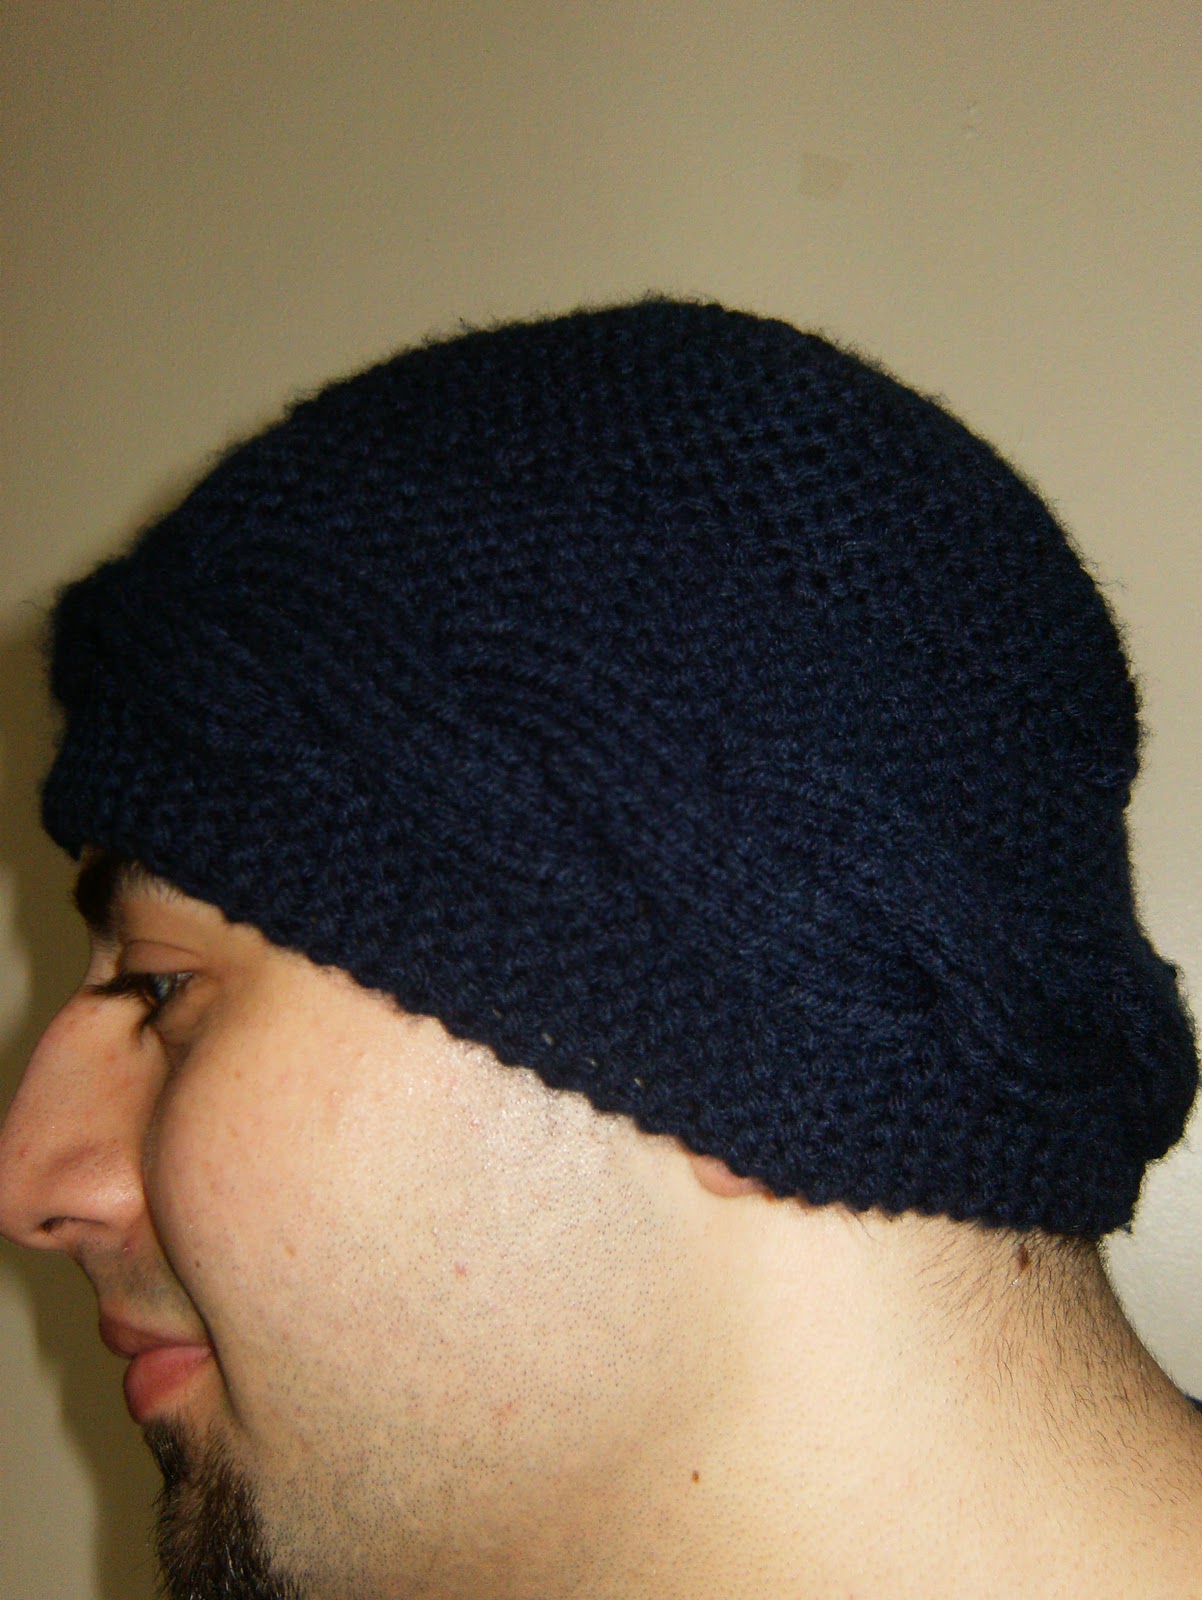
Here's the brim of my boyfriend's hat, as you can see it's a good bit longer than mine.
The next step is pinning on the brim while that hat is on the wearer's head. My boyfriend loved this part, especially because it interfered with him watching the NFL draft.
He loves me enough, that with a few reservations he allowed me to sew the brim on while it was on his head.  The only problem that can about was that he kept futzing with the hat while I was sewing and it didn't quite come out like I had imagined (I wanted the bottom edge of the brim on the hat not on his forehead).

 At his request I tacked up the folded edge of the hat. Also note that the weird bulge at the back of the hat is because my curly haired boyfriend needs a haircut, not because my pattern does something weird.

Wednesday, May 18, 2011

University Of Minnesota Hat

I go to the University of Minnesota Twin Cities. School gear is pretty expensive, maroon and gold yarn however is not.  After trying my first stranded project in the only extra yarn I had sitting around, which happened to be maroon and gold I decided to try and make my own M chart. I spent about forty five minutes with a U of M logo a picture of grid lines and paint to make the chart. This is the third try and I think it turned out well. As soon as I finished, I showed it to my roommate who had just gotten home, she gave me this look and said 'you know there are websites that will do that for you right?' No, no I did not know that, but I think I did a good job anyways. So this chart is truly handmade and unlicensed by the U.  I did make it in maroon and gold because that's my school colors, but if you went to the University of Michigan for instance You could make the hat blue and yellow to be your school colors. Anyways, the pattern basically makes a nice warm hat with an M on it in whatever colors you want and the M can mean whatever you want.


University of Minnesota Hat
Size 6  circular needles
Worsted weight yarn 2 colors (maroon and gold)
Stitch markers
Using contrast color cast on 112 stitches. Knit one round k2 p2. Using main color knit 9 rounds of k2 p2.  Knit 8 rounds . Start chart. A word of warning in knitting the chart, make sure you leave your yarn loose enough when you switch colors or your hat will kinda bunch up. Mine looks a little crinkly, but it smooths out when you put it on. Place stitch markers inbetween repeats of the chart. Knit 3 rounds


Shape crown:
Round 1: [K14, K2Tog] 7 times= 105 sts
Round 2: Knit
Round 3: [K13, K2Tog] 7 times= 98 sts
Round 4: Knit
Round 5: [K12, K2Tog] 7 times= 91 sts
Round 6: Knit
Round 7: [K11, K2Tog] 7 times= 84 sts
Round 8: Knit
Round 9: [K10, K2Tog] 7 times= 77 sts
Round 10: Knit
Round 11: [K9, K2Tog] 7 times = 70 sts
Round 12: Knit
Round 13: [K8, K2Tog] 7 times= 63 sts
Round 14: [K7, K2Tog] 7 times= 56 sts
Round 15: [K6, K2Tog] 7 times= 49 sts
Round 16: [K5, K2Tog] 7 times= 42 sts
Round 17: [K4, K2Tog] 7 times= 35 sts
Round 18: [K3, K2Tog] 7 times= 28 sts
Round 19: [K2, K2Tog] 7 times= 21 sts
Round 20: [K1, K2Tog] 7 times= 14 sts
Round 21: [K2Tog] 7 times= 7 sts
Cut a long tail, draw it through the remaining sts to close top of hat. Bring tail to the wrong side and weave in your ends.

Monday, March 7, 2011

Echo's Headband, Inner Truth Cable

I wanted to to something a bit more intricate for Echo's headband than the cable on my hat.  I looked around and finally found this scarf. I liked the look of the cable, so to make it a headband I went down two needle sizes and added some edging.  I found this cable very annoying to work because I had to count every stitch. I also ended up having to restart it seven times before I could even get past row six.  Once I got the hang of it it went OK, but I kept wishing it would just end because I have been having a very stressful week and I want to go back to my simple scarf. I liked the pattern better in the scarf pictures than I did  when I was up close in person to it.  I got bored of it always twisting the same way, and if I ever do it again (not likely) I would alternate the inner cable twist just to change it up.


Materials:
size 8 (us) needles
cable needle
worsted weight yarn
(I used about 100yds of Berroco comfort)


Abbreviations:
H3F slip three stitches onto the cable needle and hold to the front (hold 3 to the front)
H5F slip five stitches onto the cable needle and hold to the front
H5B slip five stitches onto the cable needle and hold to the back
 [ ] stitches on cable needle

Cast on 24 stitches

you may knit a set up row if you like. I did the first several times I started, but forgot to on the seventh time which was the final time I started. It turned out just fine.

Row 1: sl 1 k1 p2 k3 p2 k6 p2 k3 p2 k2
Row 2: sl1 p1 k2 p3 k2 p6 k2 p3 k2 p2
Row 3: sl1 k1 p2 k3 p2 H3F k3 [k3] p2 k3 p2 k2
Row 4:sl1 p1 k2 p3 k2 p6 k2 p3 k2 p2
Row 5: sl1 k1 p2 H5F k3 [p2 k3] H5B k3 [p2 k3] p2 k2
Row 6:sl1 p1 k2 p3 k2 p6 k2 p3 k2 p2
Row 7: sl 1 k1 p2 k3 p2 k6 p2 k3 p2 k2
Row 8:sl1 p1 k2 p3 k2 p6 k2 p3 k2 p2
Row 9: sl 1 k1 p2 k3 p2 k6 p2 k3 p2 k2
Row 10:sl1 p1 k2 p3 k2 p6 k2 p3 k2 p2
Row 11: sl 1 k1 p2 k3 p2 k6 p2 k3 p2 k2
Row 12:sl1 p1 k2 p3 k2 p6 k2 p3 k2 p2

repeat these twelve rows until the headband measures 23" when lightly stretched (it will stretch on the wearer)
-I did the pattern 11 times
Bind off. Seam ends of the headband together. Weave in ends.

Sunday, February 20, 2011

Cable Crown Hat


I was knitting my first cabled project ever when my roommate sat on me. My knitting was ruined, but in retrospect that's ok.  I really hated the edging on that scarf, and by having to start over I got to redesign the scarf into something I liked much more (will post when scarf is complete). When I showed it to my boyfriend he thought that it was really cool, so I designed him this hat that matches my scarf. Of course I also made myself a hat which is the one pictured.
Cable Crown Hat
Materials:
Size 8 (US) dpns, size 8 circular if desired
Worsted weight yarn I used about 135 yds

Band:
Cast on 24 stitches use 2 dpns to knit the band.
Knit the first row. (This is a set up row)
Row 1: sl 1 k5 (place stitch marker) p12 (place second stitch marker) k6
Row 2: sl 1 k5 k12 k6
Row 3: sl 1 k5 p12 k6
Row 4: sl 1 k5 k12 k6
Row 5: sl 1 k5 p12 k6
Row 6: sl 1 k5 slip 6 stitches onto cable needle and let hang to back k6 and then knit the 6 stitches off the cable needle. Be sure to pull tight at the ends of the cable to avoid holes. K6
Row 7: sl 1 k5 p12 k6
Row 8: sl 1 k5 k12 k6
Row 9: sl 1 k5 p12 k6
Row 10: sl 1 k5 k12 k6
Row 11: sl 1 k5 p12 k6
Row 12: sl 1 k5 k12 k6

Repeat these 12 rows until the band measures desired size, it is best to stop after row 12 because your cables will be spaced evenly. My head is on the smaller side and my band measures 21”, my boyfriend has a more normal head size and his hat band is 23”. Sew the ends of the band together, the seam is least noticeable if you sew the band inside out (by sew I mean use your yarn tail and match up the stitches of your cable. Personally I have a hard time finding the seam on my hat but apparently there is a correct way to do and write this and I will amend this post once my mother, who is a much more experienced knitter emails me).  Pick up the slipped stitches around one edge of the band.  On both the hat sizes I made I picked up 70 stitches. Knit a round, purl a round until the hat measures 5 ¾” for the small size or 61/4” for the large size.  Since 70 is easily divisible by 5, I placed a stitch marker every fourteen stitches on the last round before I began the decrease.  After each marker knit or purl 2 stitches together until there are 5 stitches left. Bind off by running your tail through the last five stitches with a tapestry needle and pulling it to the inside of the hat through the hole in the top; pull tight and tuck in ends.